Page History
This article describes how to update your Blancco Management Console environment from Oracle Java to OpenJDKto utilize OpenJDK instead of Oracle Java.
| Info |
|---|
Compatibility between OpenJDK and Blancco products is explained here: JAVA and OpenJDK version compatibilty with Blancco Management Console If you have Blancco Management Console and Drive Eraser Configuration Tool installed on the same server, OpenJDK version 8 is required. |
Uninstalling existing (Oracle) Java
- Stop Blancco Management Console service
- Uninstall any existing Java version(s) from the machine
- Restart the machine
- Check that Java was successfully uninstalled
- Open Command Prompt
- Type java -version to check the currently installed version of Java. If no Java is installed you should see below error message

Installing OpenJDK
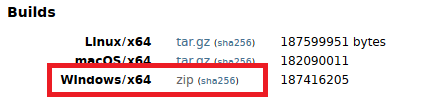
- Download the latest version of OpenJDK from https://jdk.java.net/
- Select "Windows/x64" to download the zip file
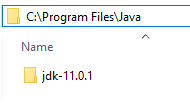
- Extract the zip file to a location where you want to install the OpenJDK (for in this example C:\Program Files\Java\jdk-11.0.1). Note that on your installation the version number of OpenJDK (in the name of the directory) may vary and you need to use the details specific to your installation.
...
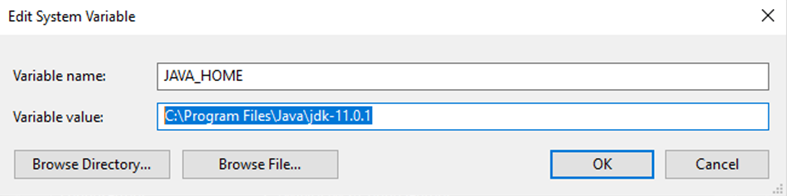
Creating "JAVA_HOME" System Variable
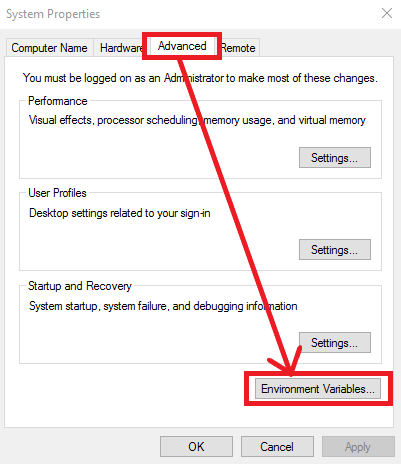
- Navigate to Control Panel > System and Security > System
- Select "Advanced System Settings" from the left panel
- Open Environment Variables by going to "Advanced"-tab and then click "Environment Variables"
- Under the "System Variables select "New"
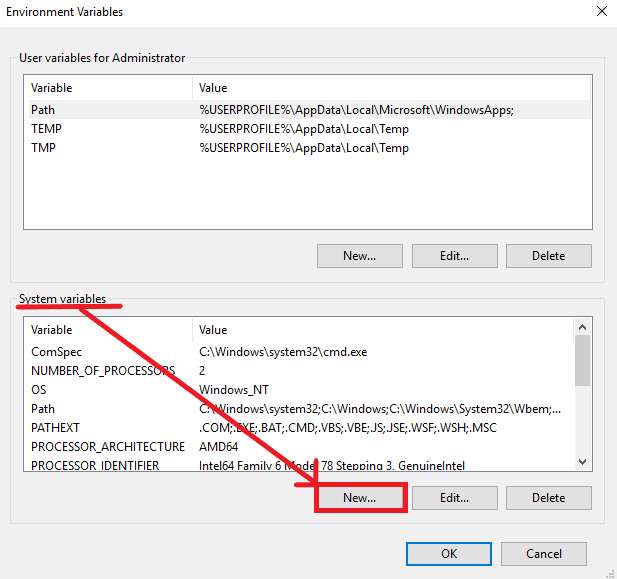
- Name the new variable as "JAVA_HOME" (without quotation marks). Variable value should point to the directory where the OpenJDK zip file was extracted (in this example C:\Program Files\Java\jdk-11.0.1\)
Updating the "Path" system variable
- Under the "Environment Variables" > "System variables" look for existing variable named as "Path"
- Select it and click "Edit..."
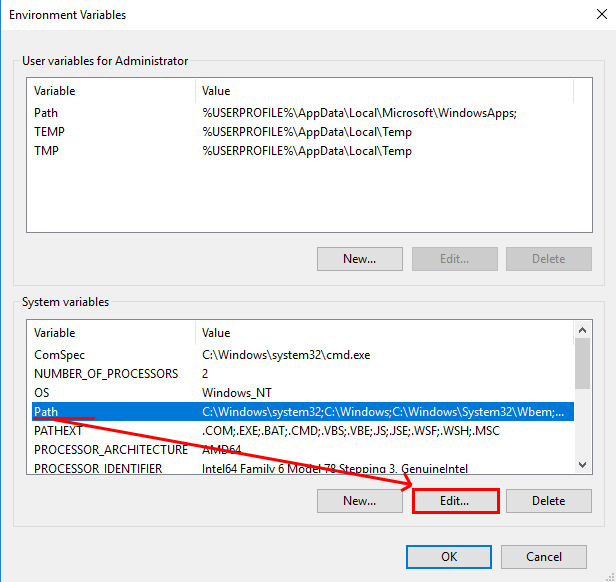
- Add the location of the bin folder of the OpenJDK installation to the PATH variable.At the end of the variable value add new entry pointing to your OpenJDK bin directory (separated by semicolon from the previous entry)
- For example if OpenJDK was extracted to C:\Program Files\Java\jdk-11.0.1, the path entry would be C:\Program Files\Java\jdk-11.0.1\bin

- Click "OK" to save the changes.
Verifying the installation
After creating/updating the corresponding system variables, restart the machine and check that OpenJDK is recognized by the machine.
- Open command prompt and run "java -version"

- You should see it pointing to the OpenJDK and also see the version information of the OpenJDK
- In case of any error messages, double check that the system variables have been set correctly