| Created date | Updated date | Affects version | Fix version |
|---|---|---|---|
|
| Enterprise USB Erasure Enablement - 1.4 and newer | N/A |
Description
Enterprise USB Erasure Enablement tool creates a bootable USB flash drive (USB stick) containing Blancco Drive Eraser software. The user selects a Drive Eraser ISO image that will be written to the USB stick and after this, the tool is used to transfer licenses from the user's Blancco Cloud account to the USB stick.
Restrictions:
- The maximum number of licenses that can be written to the USB stick is 250. In addition, the user cannot write more licenses than there are available in the Blancco Cloud account.
- The licenses are valid for 60 days after creating the USB stick. The validity date for the licenses is carried over from the Blancco Cloud account used during the process and will be used if the expiry is sooner than 60 days.
- The user must have an existing Blancco Cloud account before creating the bootable USB drive.
Only Blancco Drive Eraser Enterprise Volume Edition licenses are supported.
- Report sending to Management Console is not supported. Report must be stored to a USB media and imported manually to Management Console.
Minimum System Requirements:
| Blancco USB Creator |
|---|
User should have administrator rights |
| Windows 7 or newer |
1GB or more free space on the system disk |
1GB or larger USB memory stick - Formatted (FAT, FAT32, NTFS) |
| Network connection which can connect to Blancco Cloud and existing Blancco Cloud account is required |
| Blancco Drive Eraser Enterprise Volume Edition 6.13.0 or later |
USB Stick must have a valid serial number |
| Blancco Drive Eraser |
|---|
| USB-port/adapter for USB-booting |
| x86 architecture machine |
| 1 GB of RAM in most cases (erasing servers with 2+ drives requires more RAM) |
| SVGA display and VESA compatible video card for graphical user interface |
Step by step instructions
To start using the software, run the executable with administrator rights. If the application is run without admin rights, it prompts the user for permission elevation to admin level.
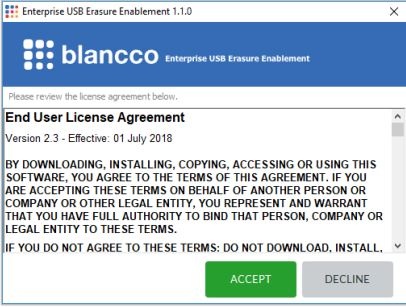
- The first screen displays the license agreement (EULA). Accept it to continue.
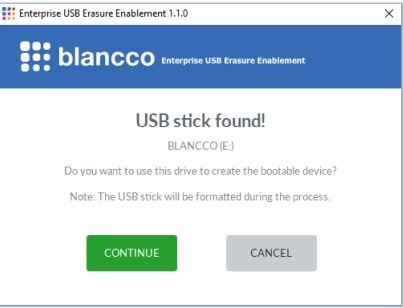
- Insert the USB stick to the machine. If the USB stick is already connected, reconnect it.

- Once the USB stick has been detected, press “Continue” to move to the next step in the process.
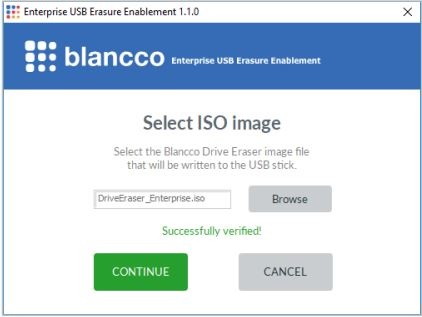
- Click “Browse” to open the Window’s File Explorer and use it to select the ISO image. Once the ISO image has been selected, continue the process.
- Sign in to your Blancco Cloud account.
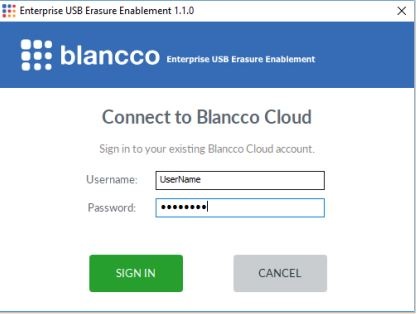
- Once signed in, select the number of licenses to transfer to the USB stick. The default amount is one (1) license. When “Continue” is pressed the USB drive creation process is started and the licenses are consumed from Blancco Cloud.

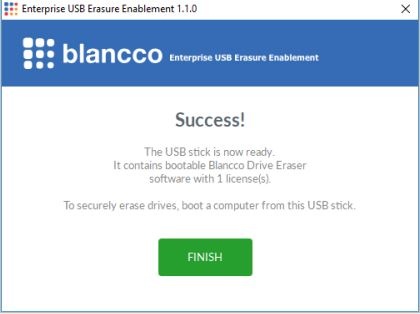
- Wait until the bootable USB stick has been created.
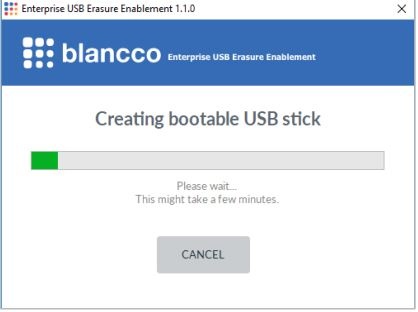
- Once finished, the following screen is displayed, and the USB stick is ready for use.