| Created date | Updated date | Affects version | Fix version |
|---|---|---|---|
|
| Mobile Diagnostics and Erasure - All versions | N/A |
Description
The barcode feature in Blancco Mobile Diagnostics and Erasure provides a set of default workflow tags that can be used to create a machine readable barcode. It is also possible to add any other workflow tag to a barcode by following below steps.
Step by step instructions
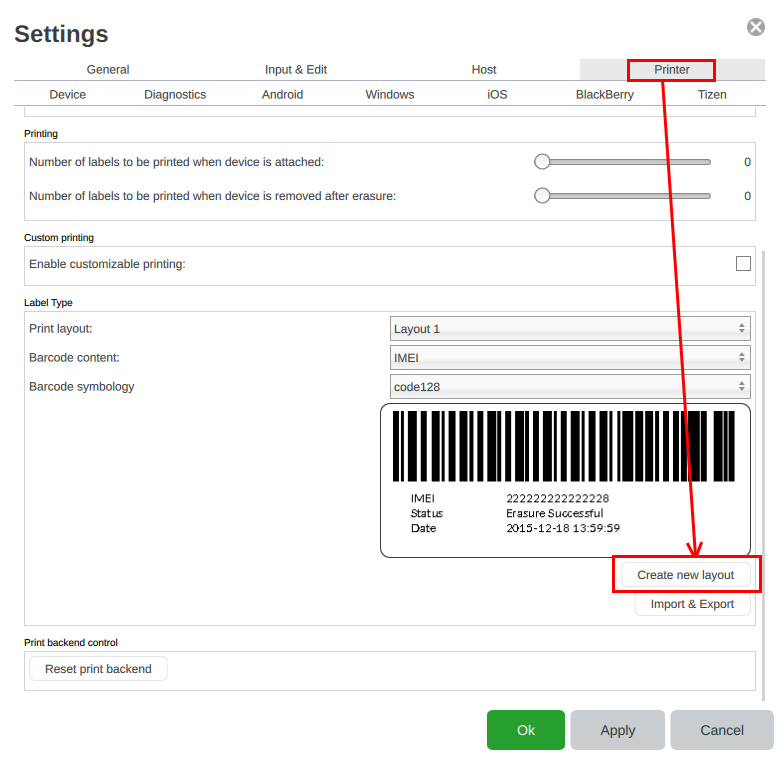
- Login to BMDE and navigate to "Settings".
- Select "Printer"-tab.
- Scroll down and select "Create new layout". If you want to edit existing label select the existing layout and select "Edit" and then right-click the view and choose "Properties".
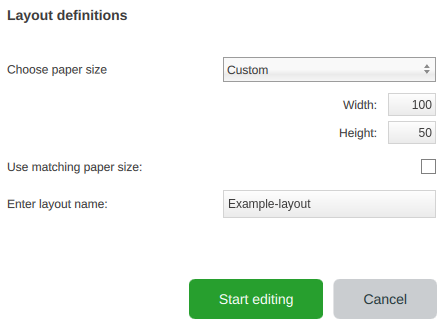
- Define the paper size, provide layout name and click "Start editing" (or "Continue editing" in case editing existing layout").
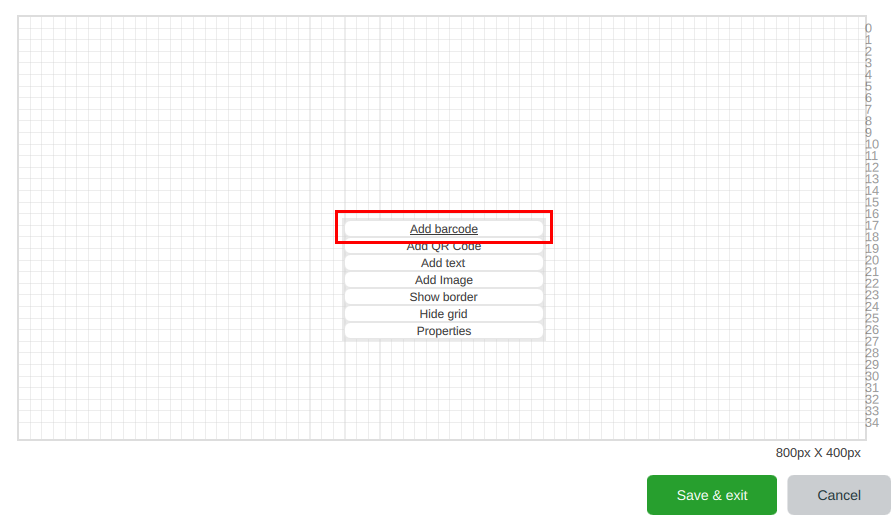
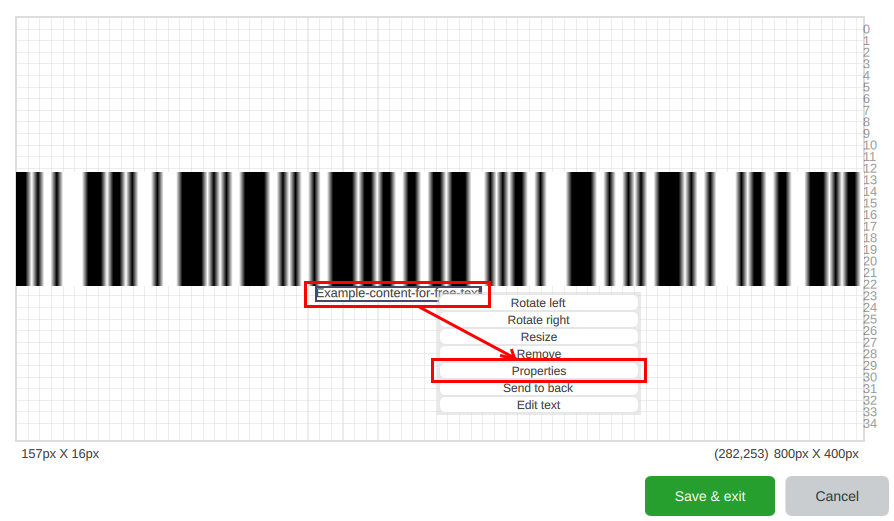
- Label editor should open, right-click on the view and select "Add barcode".
- Add desired default workflow tag fields and the "Free text" field.
- Make sure to check "Attach human readable content text".
- Add text for content of free text and content for human readable content text.
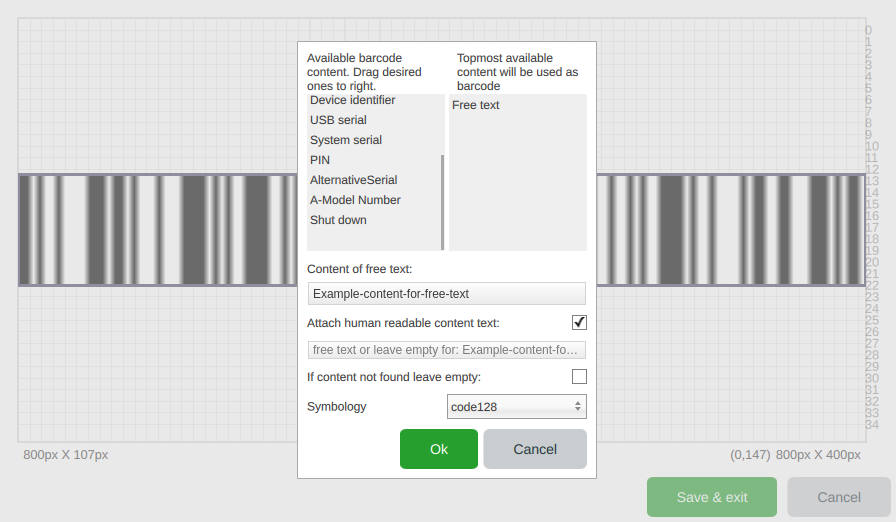
- Right-click on human readable content field under barcode (this field can be hard to find, but it will be centered under the barcode) and select "Properties".
You can now remove the free text field if desired and add any desired workflow tags using the "Text content" drop down or by typing the workflow tag name in the text field box showing the unformatted text.
In this example we removed the free text entry and replaced it with "Erasure method" (<erasemethod>) and "A-Model Number" (<amodelnumber>) instead.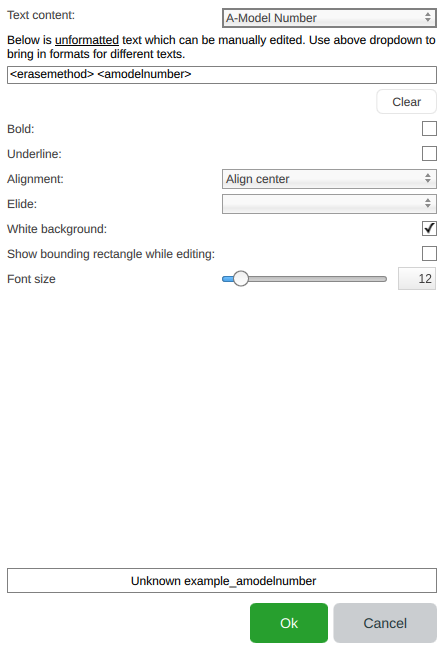
- After saving the changes you will see the example content for the workflow tags below the barcode. The content of the text field below the barcode will now be reflected in the barcode itself.
