| Created date | Updated date | Affects version | Fix version |
|---|---|---|---|
|
| Drive Eraser - 7.6 and newer | N/A |
Description
To connect the Blancco Drive Eraser software to a network share to manually save either PDF or XML reports, this setup requires some configuration on the Windows/Linux and the Blancco Drive Eraser software.
For additional details in regards to setting up a network shared folder follow instructions specific to your operating system in use. Basic examples are being described as part of the Drive Eraser Configuration Tool chapter "Network Share" starting page 33.
The following step by step instructions will explain how to configure the Drive Eraser software only.
Step by step instructions
- Upload BDE ISO image into the DECT.
- Navigate to the "Communication" tab within the DECT.
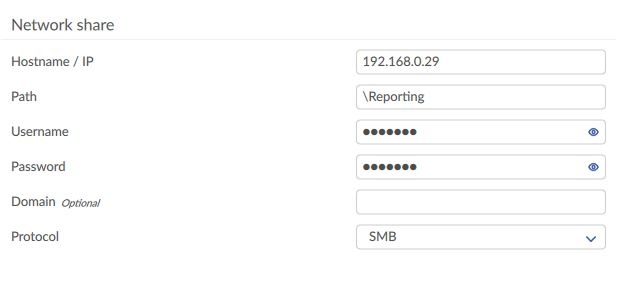
- Within the "Network Share" section, fill in the details of your host system and the directory path location you will be saving to.
- Define the hostname or IP of the device hosting the network share.
- There is no need to add the hostname as part of the "Path" field as this is combined automatically.
- A username and password that has full permissions to access the network share location is filled in the appropriate fields.
- Define the hostname or IP of the device hosting the network share.
- Once the image is fully configured with any other settings you may require once this is completed, you can save the configuration either directly to the existing ISO that was uploaded via the "Save" button or using the "Save As" button, creating a new image with the configuration that has been set.
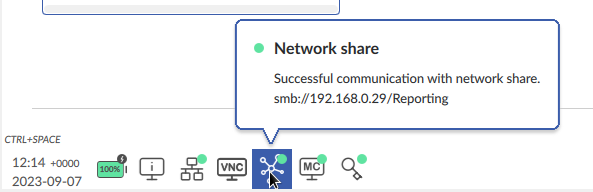
- Once the software has been booted you will be able to confirm the connection to the network share via the icon as shown in the image below, this is located on the bottom left of the software GUI, if the connection is showing a "green dot" the connection is successful. Red will mean that the connection has failed, please check your communication details and user permissions for that network share location.
- Once the erasure has completed, you will have the option to save the report to the network share location within the "Save Report" window under the "Drive" dropdown menu, the dropdown menu should show the full network share path/directory name.
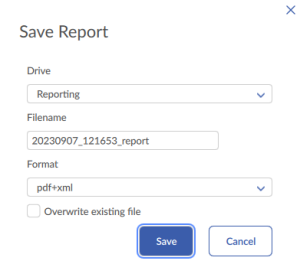
- The software should report that the save was successful.