
Page History
...
| Info |
|---|
OpenJDKとBlancco製品の互換性に関する情報は「OpenJDKのBlancco製品との互換性」をご確認ください。 同じサーバにBlancco Management ConsoleとDrive Eraser Configuration Toolをインストールする場合にはOpenJDKのバージョンは8でなければなりません。 |
Uninstalling existing (Oracle) Java
既存のOracle Javaをアンインストール
- Stop Blancco Management Console service
- Uninstall any existing Java version(s) from the machine
- Restart the machine
- Check that Java was successfully uninstalled
- Open Command Prompt
- Type java -version to check the currently installed version of Java. If no Java is installed you should see below error message

Installing OpenJDK
- Consoleサービスを停止
- インストールされているJavaを全部アンインストール
- コンピュータを再起動
- 念のためJavaがアンインストールされたことを確認
- コマンドプロンプトを起動
- コマンド「java -version」を実行。アンインストールされていれば次のように表示されます。

OpenJDKをインストール
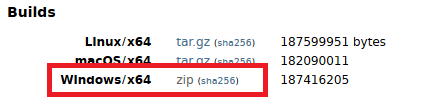
- OpenJDKをダウンロードするため Download the OpenJDK from https://jdk.java.net/を開く
- 「Windows/x64」のzipを選んでダウンロードSelect "Windows/x64" to download the zip file
- Extract the zip file to a location where you want to install the OpenJDK (in this example OpenJDKのzipファイルを展開してインストールしたいフォルダに設置 (この例では C:\Program Files\Java\jdk-11 .0.1). Note that on your installation the version number of OpenJDK (in the name of the directory) may vary and you need to use the details specific to your installation.

Creating "JAVA_HOME" System Variable
- とします)。なおダウンロードした時のOpenJDKのバージョンによってフォルダ名は変わるため、適宜読み替えが必要になります。
システム環境変数「JAVA_HOME」を定義
- 「コントロールパネル > システムとセキュリティ > システム」を開く
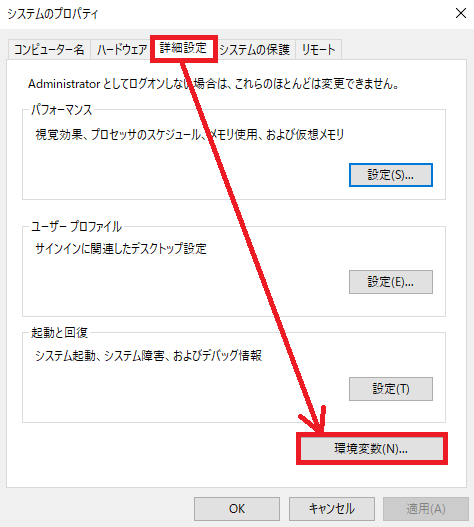
- 左側のパネルから「システムの詳細設定」を開く
- 「詳細設定」タブ内の「環境変数」を開く
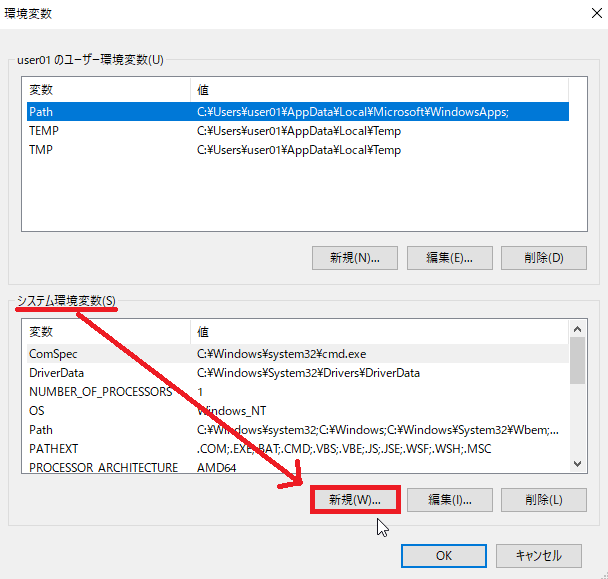
- 「システム環境変数」配下の「新規」をクリック
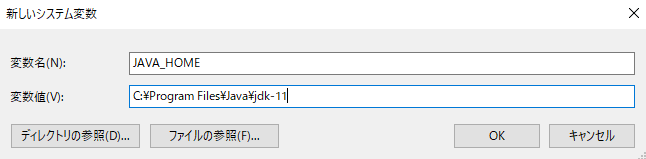
- 環境変数名は「JAVA_HOME」、変数値はOpenJDKフォルダのパスを指定します。この例では「C
- Navigate to Control Panel > System and Security > System
- Select "Advanced System Settings" from the left panel
- Open Environment Variables by going to "Advanced"-tab and then click "Environment Variables"

- Under the "System Variables select "New"

- Name the new variable as "JAVA_HOME" (without quotation marks). Variable value should point to the directory where the OpenJDK zip file was extracted (in this example C:\Program Files\Java\jdk-11.0.1\)

Updating the "Path" system variable
- 11」になります。
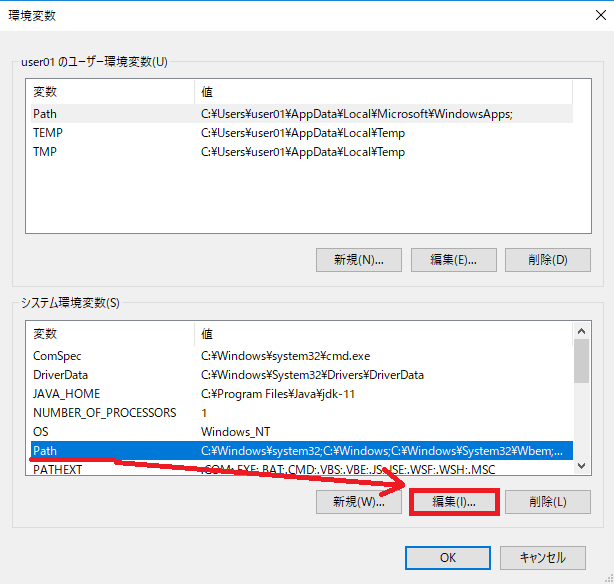
環境変数「Path」を更新
- 「環境変数」> 「システム環境変数」の中から「Path」変数を探す
- Path変数を選択してから「編集」をクリック
- Path変数にOpenJDKのbinフォルダを追加
- この例では「C
- Under the "Environment Variables" > "System variables" look for existing variable named as "Path"
- Select it and click "Edit..."

- Add the location of the bin folder of the OpenJDK installation to the PATH variable.
- For example if OpenJDK was extracted to C:\Program Files\Java\jdk-11.0.1, the path entry would be C11」にOpenJDKをインストールしたのでPath変数には「C:\Program Files\Java\jdk-11.0.1\binbin」を新規追加します。

- Click "OK" to save the changes.
Verifying the installation
After creating/updating the corresponding system variables, restart the machine and check that OpenJDK is recognized by the machine.
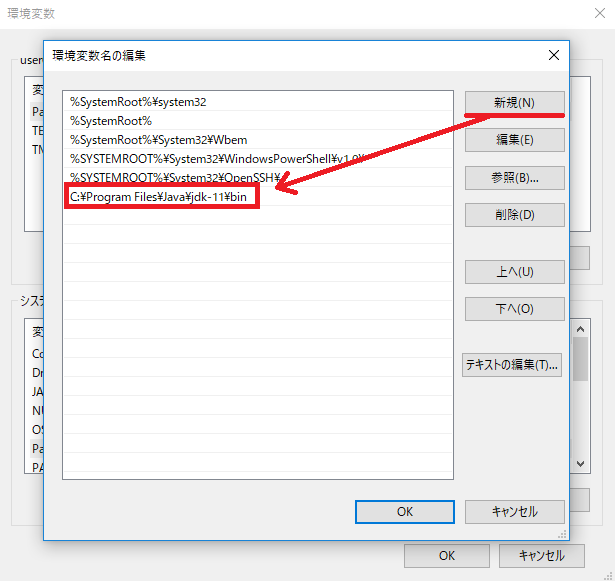
- 「OK」をクリックして保存。
インストールの確認
システム変数の設定後、コンピュータを再起動してから確認を行います。
- コマンドプロンプトを起動し、コマンド「java -version」を実行。

- 手順に問題がなければOpenJDKが検出され、OpenJDKのバージョン番号が表示されます。
- エラーが表示されてしまった場合はシステム変数の設定を今一度見直してください。
- Open command prompt and run "java -version"

- You should see it pointing to the OpenJDK and also see the version information of the OpenJDK
- In case of any error messages, double check that the system variables have been set correctly