
Page History
Diese Kurzanleitung unterstützt Sie beim Einstieg in die Blancco-Software und bietet Anleitungen zum Erstellen bootfähiger Blancco-USB-Sticks.
Um Blancco Drive Eraser oder Blancco Mobile Diagnostics and Erasure auszuführen, müssen Sie einen bootfähigen USB-Stick mit dem entsprechenden ISO-Image vorbereiten. Die Software kann durch Booten des Geräts / Host-Rechners von dem mit Blancco USB Creator erstellten USB-Stick gestartet werden.
Die neueste Version von Blancco USB Creator finden Sie hier: Download: Blancco USB Creator
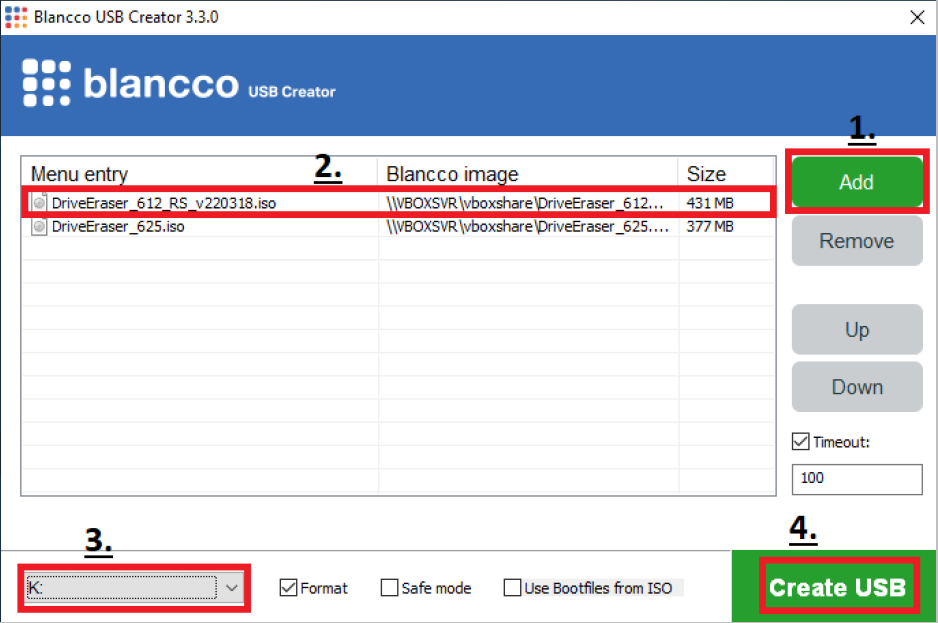
Führen Sie die Software aus, um einen bootfähigen USB-Stick zu erstellen und folgen Sie den folgenden Schritten:
- Drücken Sie die Taste „Add“ und wählen Sie die ISO-Datei aus.
- Stellen Sie sicher, dass die ISO-Datei die richtigen sind. Klicken Sie auf den Namen unter dem Menüeintrag um ihn zu ändern.
- Wählen Sie das bootfähige Medium aus.
- Klicken Sie auf "Create", um ein bootfähiges Medium zu erstellen.
Hinweis. Wenn die Option "Format" ausgewählt ist, wird der USB formatiert und alle vorhandene Daten auf dem USB werden gelöscht!
Weitere Einzelheiten und eine vollständige Liste der Funktionen finden Sie im vollständigen Benutzerhandbuch im
This Quick Start Guide helps you to get started with Blancco software and provide the guidance on how to create bootable Blancco USB-sticks.
In order to run Blancco Drive Eraser or Blancco Mobile Diagnostics and Erasure you will need to prepare a bootable USB-stick using the corresponding ISO image. The software can be booted up by booting the device/host machine from the USB-stick created with Blancco USB Creator.
The latest version of Blancco USB Creator can be found from here: Download: Blancco USB Creator
In order to create a bootable USB, run the software and follow below steps:
- Press the “Add” key and select the image file.
- Make sure the image files are the correct ones. Click the name under the “Menu entry” to change it.
- Select the bootable media.
- Press “Create” to create a bootable media.
Note. If the "Format" option is selected, the USB will be formatted and existing data on the USB will be removed!
For more details, please refer to the full user manual which can be found here.